
Living in Tucson means dealing with the effects of hard water on our home’s plumbing. That mineral buildup can cause all sorts of unexpected issues, including a stubbornly running toilet. If you’ve found your toilet won t stop running even when float is up, sediment could be the hidden villain. Tiny particles can get lodged in the fill valve, preventing it from closing completely, or they can settle on the flapper, breaking its watertight seal. While the float is doing its job perfectly, these other components are failing due to wear and tear exacerbated by our water quality. This guide will show you how to diagnose these common issues and perform the simple fixes to get your toilet running properly again.
Key Takeaways
- The problem is rarely the float’s position: A constantly running toilet is almost always caused by a worn-out flapper letting water leak into the bowl or a faulty fill valve that can’t shut off completely.
- You can find the leak in minutes: Perform a few simple checks inside the tank. Lift the float arm to see if the water stops, press down on the flapper to check its seal, and verify the water level is below the overflow tube.
- Simple adjustments often solve the problem: Before buying new parts, try cleaning the components, adjusting the chain length, or correcting the water level. If these quick fixes don’t work, it’s a smart move to call a professional to handle the issue.
Why Is My Toilet Still Running? (Even When the Float Is Up)
It’s one of the most annoying household sounds: the toilet that just won’t stop running. You lift the tank lid, see the float is up where it should be, and scratch your head. If the float’s job is to stop the water, why is it still going? It’s a common misconception that the float is the only part that matters. In reality, your toilet’s tank is a small system of interconnected parts, and a problem with any of them can cause that constant, water-wasting hiss. The good news is that the fix is often simpler than you might think. Let’s walk through how this system works and debunk a few myths about that tricky toilet float.
How the Float Mechanism Works
Think of the float as the traffic cop for your toilet tank. Its only job is to move up and down with the water level and tell the fill valve when to stop letting water in. After you flush, the tank empties, and the float drops. This signals the fill valve to open and refill the tank. As the water rises, so does the float. When it reaches the correct height, it triggers the fill valve to shut off. If the float is set too high, water will continuously pour into the overflow tube, causing the toilet to run. If it’s too low, you’ll get a weak flush. Getting this balance right is key to a well-functioning toilet and is a common part of many residential plumbing adjustments.
Busting Common Myths About the Toilet Float
Many people assume that if the float is up, the problem must be somewhere else entirely. But it’s not that simple. The float can be in the correct position, but the fill valve it controls might be faulty or worn out internally. Even if it looks fine on the outside, its inner seals can fail, allowing water to keep seeping through. Another common issue is a water level set so high that it constantly spills into the overflow tube, even after the float has signaled the valve to close. This creates a silent leak that wastes a surprising amount of water and can lead to a much higher water bill. A constantly running toilet is a clear sign that one of these components needs a closer look.
Top Reasons Your Toilet Keeps Running (Even With a High Float)
You’ve done the first logical check: you lifted the float arm, and the water is still running. It’s a frustrating little mystery, but it usually means the problem isn’t the float’s position but another component inside the tank. When your toilet keeps filling, it’s not just annoying; it’s also wasting gallons of water and driving up your utility bill. The good news is that the phantom flushing is almost always caused by one of a few small, inexpensive parts that have worn out or shifted out of place. Before you get overwhelmed, let’s walk through the four most common culprits behind a constantly running toilet. Pinpointing the exact cause is the first step to a quiet, efficient bathroom.
Is Your Fill Valve the Culprit?
The fill valve is the tall column in your toilet tank responsible for refilling it with water after you flush. The float is attached to this valve, signaling when the tank is full. If the fill valve is old, clogged, or broken, it won’t be able to shut off the water flow, even when the float tells it to. Think of it as a faulty faucet that just won’t turn off completely. You’ll hear a constant hissing sound as water continues to trickle into the tank. Sometimes, cleaning the valve can solve the problem, but often, the internal seals are worn out and the entire valve needs to be replaced. It’s a common piece of any residential plumbing system that sees a lot of wear and tear.
A Worn-Out or Leaky Flapper
The flapper is the rubber or plastic seal at the bottom of your tank that covers the drain. When you flush, the chain lifts the flapper, allowing water to rush into the bowl. Over time, this rubber stopper can warp, crack, or accumulate mineral buildup, preventing it from creating a watertight seal. This is one of the most frequent causes of a running toilet. Even a tiny, slow leak from the tank into the bowl is enough to make the water level drop, which then triggers the fill valve to turn on and refill the tank. This cycle repeats endlessly, creating that familiar sound of a toilet that never stops running.
An Incorrectly Sized Chain
That little beaded chain connecting the flush handle to the flapper plays a surprisingly important role. If the chain is too short, it will hold the flapper slightly open, never allowing it to seal the drain properly. On the other hand, if the chain is too long, it can get tangled or caught underneath the flapper, also preventing a complete seal. This is a simple fix, but it’s often overlooked. Take a peek inside your tank; the chain should have just a little bit of slack when the flapper is closed. Getting the length just right is key to ensuring the flapper can do its job effectively after every flush.
Pesky Debris and Mineral Buildup
Here in Tucson, we’re no strangers to hard water. Over time, minerals, sediment, and other small bits of debris can build up inside your toilet tank. These particles can get lodged in the fill valve, preventing it from closing all the way. They can also settle on the flapper or around the drain opening, creating a rough surface that breaks the seal. This buildup can cause slow, persistent leaks that keep your toilet running. If you notice a gritty or rusty substance in your tank, it might be time to clean the components or consider how mineral buildup is affecting your home’s drains and sewer lines.
Your Step-by-Step Guide to Finding the Leak
That constant running sound can be maddening, but don’t worry. Pinpointing the source of the leak is usually straightforward. With a little detective work inside your toilet tank, you can figure out exactly what’s going on. Let’s walk through a few simple checks to identify the culprit behind your running toilet. These steps will help you diagnose the problem so you can get it fixed quickly and stop wasting water.
Start With a Visual Inspection
First things first, take the lid off your toilet tank and take a look inside. A toilet that won’t stop running is almost always caused by a problem right here in the tank. You’ll see a few key parts: the tall fill valve, the float that rises with the water, and the rubber flapper at the bottom. A quick visual check can often reveal the issue. Is the chain tangled? Does the flapper look worn out or out of place? Just getting familiar with these components is a great first step.
Test the Fill Valve
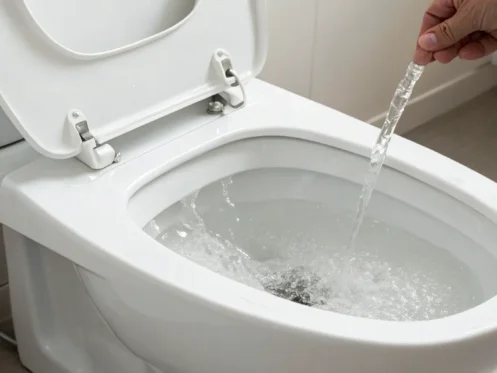
The fill valve is responsible for refilling the tank after a flush. To see if it’s the problem, gently lift the float arm all the way up. This action should stop the water from running. If the water keeps flowing even with the float held high, the fill valve’s internal mechanism is probably failing. Before you rush to replace it, try giving it a quick clean. Turn off the water supply, remove the valve’s top cap, and flush it with a quick burst of water to clear any sediment causing trouble with your residential plumbing.
Check the Flapper’s Seal
Think of the flapper as the plug for your toilet tank’s drain. When you flush, it lifts up, and when the tank is empty, it drops back down to create a seal. Over time, this rubber part can get brittle, warped, or covered in mineral buildup, which prevents it from sealing properly. This creates a slow, constant leak into the bowl, forcing the fill valve to keep turning on. You can test this by gently pressing down on the flapper. If the running water sound stops, you’ve found your problem: a leaky flapper that needs to be replaced.
Inspect the Water Level and Overflow Tube
Take a look at the water level in the tank. It should sit about an inch below the top of the tall, open pipe in the middle, which is the overflow tube. The float tells the fill valve when to shut off, so if it’s set too high, the tank will overfill. Excess water will then spill into the overflow tube and run down into the bowl, creating a never-ending cycle of filling and draining. If you see water constantly trickling into the tube, you’ll need to adjust the water level by twisting a screw or dial on the fill valve to make the float sit a bit lower.
Simple Fixes for a Constantly Running Toilet
Once you’ve pinpointed why your toilet won’t stop running, you can get to work on the solution. The good news is that most of these issues are simple enough to handle on your own with just a few basic steps. You don’t need to be a plumbing pro to tackle these common problems. From a quick cleaning to a minor adjustment, these fixes can save you water and restore some peace and quiet to your bathroom. Let’s walk through the four most common solutions to get your toilet back in working order.
Clean or Adjust the Fill Valve
A faulty fill valve is often the reason a toilet keeps running. Over time, sediment and mineral buildup can prevent the valve from closing completely. Before you think about replacing it, try giving it a good cleaning. Start by turning off the water supply to the toilet. Then, remove the fill valve cap and slowly turn the water back on for a few seconds to flush out any debris. If cleaning doesn’t do the trick, the float might be set too high. Lowering the float adjustment screw can help. If your toilet still runs, the valve itself might be worn out and need a full replacement.
Replace or Reposition the Flapper
The flapper is the rubber seal at the bottom of your tank that lifts when you flush. If it’s not creating a perfect seal, water will continuously leak into the bowl. Flappers can become brittle, warped, or covered in mineral deposits over the years, which stops them from sealing the drain properly. First, check to see if it’s just misaligned and needs to be repositioned. If it looks worn out or damaged, it’s best to replace it. This is an inexpensive part you can find at any hardware store, and swapping it out is one of the easiest residential plumbing repairs you can make.
Adjust the Chain Length
The small chain connecting the flush handle to the flapper plays a surprisingly important role. If the chain is too short, it will pull on the flapper and prevent it from sealing completely. If it’s too long, it can get tangled or caught underneath the flapper, also causing a leak. The ideal length allows for just a little bit of slack when the flapper is closed. You can easily adjust the chain by moving the clip to a different link. This simple tweak costs nothing and can often be the quick fix you need to stop that constant running sound for good.
Correct the Water Level
If the water level in your tank is too high, it will constantly spill into the overflow tube, and your toilet will run nonstop to replace it. Take a look inside the tank; the water should sit about an inch below the top of that tube. If it’s too high, you’ll need to adjust the float. For older toilets with a ball-and-arm float, you can gently bend the arm downward. On newer models, you’ll likely find an adjustment screw or a clip on the float that you can move to lower the water level. If these fixes don’t work, it might be time to schedule a professional to take a look.
Tools and Materials You’ll Need for the Job
Before you roll up your sleeves, it’s a good idea to gather everything you’ll need. Having the right tools and potential replacement parts ready will make the repair process much smoother and save you from making a last-minute trip to the hardware store with a non-working toilet. Think of it as your mission prep, ensuring you have everything you need to get the job done right the first time.
Your DIY Toilet Repair Toolkit
You don’t need a professional-grade toolbox for this job, just a few key items. First and most importantly, you need to turn off the water supply to the toilet. Look for a small, silver knob on the wall or floor behind the toilet and turn it clockwise until it stops. Once the water is off, flush the toilet to drain the tank.
Here are a few other things to have on hand:
- An old towel or a sponge to soak up any remaining water in the tank
- A small bucket to catch drips
- A pair of adjustable pliers
- A flathead or Phillips head screwdriver
With these simple tools, you’ll be ready to handle most common toilet repairs.
Helpful Replacement Parts to Have
Sometimes, a good cleaning or a simple adjustment is all it takes. Other times, you’ll need to replace a worn-out part. To save yourself time, consider picking up a universal toilet repair kit, which usually costs around $20 and contains a new flapper, fill valve, and other essential components. This is often the easiest way to ensure you have the right part. If you suspect the issue is just the flapper, you can buy one separately. However, if replacing a seal doesn’t fix the problem, you’ll likely need to replace the entire fill valve. If you get started and realize the job is more than you bargained for, you can always schedule an appointment online with our team.
Repair or Replace? When to Swap Out Toilet Parts
Sometimes, no amount of cleaning or adjusting will solve the problem. Toilet components are constantly submerged in water and eventually wear out from use and mineral buildup. Knowing when to stop tinkering and start replacing can save you a lot of time, water, and frustration. While many toilet parts are inexpensive and designed for DIY replacement, it’s important to recognize the signs that a component has reached the end of its life.
Deciding whether to repair or replace a part often comes down to a simple inspection. If a part is visibly cracked, warped, or brittle, the choice is obvious. However, some wear and tear happens internally, making it harder to spot. Below, we’ll walk through the key signs that your fill valve and flapper are ready for retirement. Catching these issues early not only silences that annoying running sound but also prevents bigger water bills and potential leaks down the road. If you ever feel out of your depth, remember that professional plumbing services are just a call away for homeowners in Tucson, Marana, and Sahuarita.
Signs It’s Time for a New Fill Valve
The fill valve is the tall column that refills the tank after you flush. If you’ve lifted the float arm all the way up and the water just keeps coming, the valve’s internal mechanism has likely failed. The small rubber seals inside can degrade over time, losing their ability to stop the flow of water completely. In this case, replacing the entire fill valve assembly is your best bet.
Before you run to the store, take a quick look at the top cap and the seal underneath it, especially if the valve is fairly new. Sometimes, a tiny piece of sediment or debris can get lodged in there, preventing it from closing properly. If a quick cleaning doesn’t solve the running, a full replacement is necessary to get your toilet working correctly again.
When to Replace the Flapper
The flapper is the rubber or plastic seal at the bottom of your tank that lifts when you flush. Its only job is to create a perfect seal to keep water in the tank. Over time, this part can become dirty, brittle, or warped, preventing it from sealing the drain correctly. This causes a slow, constant leak into the bowl, which triggers the fill valve to keep refilling the tank.
Gently run your finger along the edge of the flapper. If it feels rough, bent, or gummy, or if it has visible mineral deposits, it’s time for a new one. Flappers are one of the most common culprits behind running toilets and are thankfully very easy and affordable to replace. A faulty flapper can waste a surprising amount of water, impacting your home’s drains and sewer system over time.
General Wear-and-Tear Warning Signs
Even if your toilet parts look fine on the outside, their internal components can be worn out. After years of use, plastic becomes brittle and rubber seals lose their flexibility. A worn-out rubber seal inside the fill valve or a flapper that no longer sits flat are common issues that aren’t always obvious at first glance. If you’ve tried all the simple adjustments and your toilet is still running, it’s safe to assume that one of the parts is simply too old to do its job effectively.
Think of these parts like any other hardworking component in your home; they have a limited lifespan. Proactively replacing them every few years can be a smart move. Including your toilet mechanisms in a regular home check-up is a great way to stay ahead of problems, much like our maintenance agreement helps you care for your home’s larger systems.
How to Prevent Your Toilet From Running in the Future
Once you’ve fixed your running toilet, the last thing you want is a repeat performance. The good news is that a little preventative care can go a long way in keeping your toilet in top shape. You don’t need to be a plumbing expert to avoid future headaches. By creating a few simple habits, you can protect your toilet’s internal parts from premature wear and tear, saving yourself from the annoying sound of a constantly running toilet and the higher water bills that come with it.
Taking a proactive approach means you can catch small issues before they turn into bigger, more expensive problems. From routine checks to being mindful of what goes down the drain, these simple steps will help ensure your toilet functions quietly and efficiently for years to come. Think of it as a small investment of your time that pays off in peace of mind and lower utility costs.
Create a Simple Maintenance Routine
A running toilet can waste a surprising amount of water, which is why a quick check-up every six months is a great idea. You don’t need any special tools, just your eyes and ears. Listen for any hissing sounds or phantom flushes when the toilet isn’t in use. Take the lid off the tank and watch a full flush cycle. Does the fill valve shut off completely? Does the flapper create a tight seal? Catching these small issues early can prevent a simple fix from becoming a major repair. For total peace of mind, our maintenance agreement includes plumbing inspections to catch problems before they start.
Consider Your Water Quality
Here in Tucson, we’re no strangers to hard water. Over time, mineral deposits and small bits of sediment can build up inside your toilet tank. These particles can get lodged in the fill valve, preventing it from closing all the way and causing a slow, constant leak into the bowl. If you notice grit or discoloration in your tank, it might be time to gently clean the internal components. Wiping down the fill valve and flapper can help them function properly. Addressing water quality issues can protect all your residential plumbing fixtures, not just your toilet.
Know What Not to Flush
Your toilet is designed to handle one job: flushing human waste and toilet paper. Flushing anything else can cause serious problems. So-called “flushable” wipes, cotton balls, paper towels, and dental floss don’t break down properly and can get caught on the flapper, preventing it from sealing. This not only causes the toilet to run but can also lead to stubborn clogs. Sticking to the basics is the easiest way to protect your toilet’s delicate internal parts and avoid a call for drain and sewer services. Treat your toilet right, and it will return the favor.
Common DIY Mistakes to Avoid
Tackling a home repair project yourself can be incredibly satisfying, but a simple toilet fix can quickly become a headache if you’re not careful. We’ve seen it all, and a few common missteps are responsible for most DIY plumbing frustrations. Before you get started, take a moment to review these common mistakes. Knowing what to watch out for can save you from a much bigger mess and a second trip to the hardware store.
Forgetting to Turn Off the Water
This might seem obvious, but in the rush to fix the annoying sound of a running toilet, it’s the most common and potentially messiest mistake. Before you do anything else, you must turn off the water supply. Look for a small, silver knob on the wall or floor behind the toilet and turn it clockwise (to the right) until it stops. This simple action prevents a minor repair from turning into a major water cleanup. Once the water is off, flush the toilet to drain the tank, and you’ll be ready to work without worrying about accidental flooding. It’s a foundational step for any residential plumbing project.
Missing Hidden Debris
If you’ve adjusted the float and the toilet is still running, the problem might be something you can’t easily see. Over time, small bits of sediment and mineral buildup from the water can get lodged in the fill valve, preventing it from closing completely. This is especially common in areas with hard water. Even a tiny piece of debris can be enough to break the seal and cause a constant, slow leak into the bowl. When you’re inspecting the tank, take a moment to gently clean the fill valve and check for any grit that might be causing the issue. This hidden gunk is often the real culprit behind a stubborn drain and sewer problem.
Assuming Old Parts Still Work
Toilet components work hard, and they don’t last forever. It’s easy to assume a part is fine just because it isn’t visibly cracked or broken. However, the rubber on a flapper can become brittle and warped over time, and the internal seals of a fill valve can wear out. Even if nothing looks obviously wrong, these worn-out parts can fail to create a proper seal. If your toilet is several years old and you’ve tried other fixes without success, it’s often best to simply replace the flapper and fill valve. It’s an inexpensive fix that can save you a lot of troubleshooting time. If you find the job is more than you bargained for, you can always schedule online with us.
Know When to Call a Plumber in Tucson
Tackling a running toilet on your own is a great way to save a little money and learn more about how your home works. But there comes a point in many DIY projects where it’s smarter to tag in a professional. If you’ve followed all the steps, tried the common fixes, and are still hearing that phantom running water, it’s probably time to put down the wrench. Calling a plumber isn’t admitting defeat; it’s making a strategic move to protect your home from potential water damage and your wallet from a sky-high water bill. A running toilet can waste hundreds of gallons of water a day, and that adds up quickly.
Sometimes, a constantly running toilet is a symptom of a more complicated issue that a simple part replacement won’t solve. That’s where having an expert eye makes all the difference. A professional plumber can quickly diagnose the root cause, whether it’s a hidden leak, a water pressure problem, or something else entirely that affects your whole system. For homeowners in Tucson, Oro Valley, and Marana, getting that expert help is simple. Instead of spending another weekend troubleshooting and making extra trips to the hardware store, you can schedule a service call and have peace of mind knowing the job will be done right the first time.
When the Repair Feels Too Complex
You’ve replaced the flapper, adjusted the float, and even tried a new fill valve, but your toilet is still running. When you’ve exhausted all the DIY solutions and the problem persists, it’s a clear sign the issue is more complex than it appears. This is the perfect time to call for professional help. A licensed plumber has the diagnostic tools and experience to identify tricky problems that aren’t obvious to the untrained eye. What might seem like a stubborn toilet could be related to your home’s water pressure or a subtle crack in the tank. Letting an expert take over ensures the problem is fixed correctly, preventing wasted water and future headaches.
Signs It’s Time to Call for Help
Sometimes your toilet sends clear signals that it needs more than a quick fix. If you notice water flowing into the overflow tube in the tank, it means the water level is dangerously high and needs immediate professional adjustment to prevent a mess. Another red flag is a toilet that fills back up incredibly slowly, which often points to a failing fill valve or a bigger issue with your home’s plumbing system. And if you can’t see anything obviously broken but the toilet keeps running, hidden culprits like worn-out internal parts are likely to blame. Don’t let a small annoyance turn into a major repair; these are all signs it’s time to call in the pros.
Related Articles
- How to Fix a Running Toilet After Flushing: DIY Guide
- Running Toilet Repair: A Step-by-Step Guide
- How to Fix a Dual Flush Toilet That Keeps Running
Frequently Asked Questions
How can I tell for sure if the problem is the flapper or the fill valve? A great way to test the flapper is to put a few drops of food coloring in the tank and wait about 20 minutes without flushing. If you see any of that color seep into the toilet bowl, you have a leaky flapper that needs to be replaced. To test the fill valve, simply lift the float arm up as high as it will go. If the running water stops, the valve is likely fine and just needs an adjustment. If the water keeps running, the fill valve itself is faulty.
My toilet only runs for a few seconds every hour or so. Is that still a problem? Yes, that’s definitely a sign of a problem, even if it seems minor. This is often called “phantom flushing” and it’s almost always caused by a very slow leak from the tank into the bowl, usually due to a worn-out flapper. Over time, that small, intermittent refilling can waste a significant amount of water and add unnecessary wear to your toilet’s components. It’s best to address it before the leak gets worse.
Is it difficult to replace these toilet parts myself? For the most part, no. Parts like the flapper and fill valve are designed to be replaced by homeowners, and most come with clear instructions. Replacing a flapper is often as simple as unclipping the old one and clipping on the new one. A fill valve is a bit more involved but is still a very manageable project for a beginner. The key is to turn off the water supply first and have a few towels ready.
Can a running toilet cause any other damage besides a high water bill? While the high water bill is the most immediate consequence, a constantly running toilet can lead to other issues. The continuous flow of cold water can cause condensation to form on the outside of the tank, which can drip and damage the flooring over time. More importantly, a faulty part like a fill valve could fail completely, leading to an overflow and significant water damage in your bathroom.
How long do the internal parts of a toilet typically last? The lifespan of your toilet’s internal parts can vary, but a good rule of thumb is about four to five years. Components like the flapper and the fill valve seals are constantly in water and are subject to wear from use and mineral buildup. In areas with hard water, like we have here in Tucson, these parts may wear out even faster. Checking them every year or so is a great way to catch problems early.


