
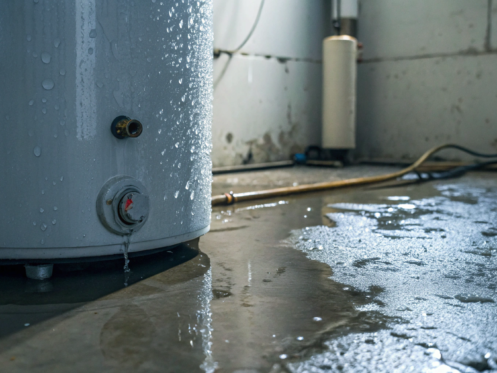
Here in Tucson, our hard water can be tough on appliances, and water heaters are no exception. Mineral buildup can lead to corrosion and component failure over time, which is a common reason for an electric water heater leaking from bottom. While seeing that puddle is always alarming, it’s a frequent issue for homeowners in our area. The good news is that not every leak is a catastrophe. By understanding the typical weak points—from drain valves to the tank itself—you can get a better handle on the problem. This guide will help you diagnose the issue with confidence.
Key Takeaways
- Identify the Real Source of the Leak: A puddle at the base doesn’t automatically mean your tank is done for. After safely shutting off the power and water, look closely—the problem could be a simple, fixable part like a loose drain valve or a worn-out heating element gasket.
- Know When to Repair vs. Replace: If your water heater is under 10 years old and the leak is from a replaceable component, a repair is a great option. However, if the tank itself is leaking or the unit is past its prime, investing in a new model is the smarter long-term decision.
- Prevent Future Leaks with Simple Maintenance: You can extend your water heater’s life and avoid emergencies with routine care. Flushing the tank annually to remove corrosive sediment and having a pro inspect the anode rod are the most effective ways to protect your tank from the inside out.
Why Is My Electric Water Heater Leaking from the Bottom?
Discovering a puddle of water around the base of your water heater is a frustrating moment for any homeowner. Your mind immediately jumps to the worst-case scenario: a flooded room and a huge replacement bill. But before you panic, take a deep breath. A leak from the bottom of an electric water heater can be caused by several different issues, and not all of them mean you need a brand-new unit.
The source of the leak could be a simple, fixable part like a valve or a gasket. However, it could also be a sign of a more serious problem, like internal tank corrosion. Identifying the cause is the first step toward finding the right solution. Below, we’ll walk through the most common culprits behind a leaky electric water heater. While some issues may seem small, remember that working with water and electricity requires caution. For any water heater repairs, it’s always safest to trust a professional technician.
A Faulty Drain Valve
At the very bottom of your water heater tank, you’ll find a small, spigot-like valve. This is the drain valve, used for flushing sediment out of the tank during maintenance. Because it’s located so low, it’s often the first suspect when you see water pooling on the floor. The leak could be happening because the valve isn’t completely closed, the internal washer has worn out, or the valve body itself has a crack. You can check to see if it’s loose and try gently tightening it, but be careful not to apply too much force, especially with plastic valves. If it continues to drip, the valve will need to be replaced.
A Failing Temperature and Pressure (T&P) Valve
The Temperature and Pressure (T&P) valve is a critical safety feature, usually located on the top or side of the tank with a pipe running down to the floor. Its job is to automatically open and release water if the temperature or pressure inside the tank gets dangerously high. If the T&P valve is failing, it might leak water down the discharge pipe, which then collects at the base of the heater. This can easily be mistaken for a leak from the tank itself. A faulty T&P valve is a serious safety concern and should be inspected by a professional right away.
Internal Tank Corrosion
This is the cause every homeowner dreads. Over the years, sediment and mineral scale—especially common with the hard water here in Tucson—can build up inside your water heater. This buildup can corrode the tank’s inner lining, eventually causing the steel to rust through and spring a leak. If you see water weeping directly from the metal tank itself, it’s a sure sign of internal failure. Unfortunately, a corroded tank cannot be repaired. The only solution is to replace the water heater entirely.
Loose Heating Element Gaskets
Your electric water heater has one or two heating elements that screw into the side of the tank to heat the water. Each element is sealed with a rubber gasket to prevent leaks. Over time, these gaskets can become brittle, crack, or get compressed, allowing water to seep out around the heating element. The water will then drip down the side of the tank and form a puddle at the bottom. While this might look alarming, the good news is that replacing a heating element gasket is a relatively inexpensive repair for a qualified plumber.
How to Find the Source of the Leak
Finding a puddle under your water heater is stressful, but with a clear head, you can pinpoint the source of the problem. Playing detective now will help you figure out if it’s a simple fix or if you need to call in a professional. Before you do anything else, your absolute first priority is safety. Once the area is secure, you can start a systematic visual check to trace the water back to its origin. This process helps you understand what’s happening so you can make an informed decision about the next steps. Leaks can come from several places—a loose connection, a faulty valve, or even the tank itself. By methodically checking each potential source, you can avoid jumping to the worst-case scenario. Remember, a leak that appears to be at the bottom might actually be dripping down from a component higher up, so a thorough inspection is key. We’ll walk you through exactly how to check each part so you can identify the issue with confidence.
First: Shut Off the Power and Water
Before you even think about getting close to the water heater, you need to make the area safe. Your first move is to cut the power. Head to your home’s circuit breaker panel and flip the breaker that controls the water heater. This is a critical step to prevent the risk of electric shock. Once the power is off, shut off the water supply to the tank. You can usually find a cold water shut-off valve on a pipe leading into the top of the heater. Turning this valve clockwise will stop more water from entering the tank and adding to the leak.
A Step-by-Step Visual Inspection
Now that the power and water are off, you can safely investigate. Start by carefully drying the entire exterior of the water heater and the floor around it with old towels. With everything dry, it will be much easier to see where new water is coming from. Grab a flashlight to get a good look at all the pipes, valves, and fittings connected to the tank. Sometimes, a leak that looks like it’s coming from the bottom is actually dripping down from a connection higher up. Take your time and be thorough—a little patience here can save you a lot of guesswork later.
Tools You’ll Need
You don’t need a full toolbox for this initial inspection, but having a few key items on hand will make the job easier. Grab a flashlight for a clear view, some dry paper towels to test for moisture, and a bucket to catch any drips. It’s also a good idea to have a garden hose nearby. If you determine the tank needs to be drained, you can attach a garden hose to the drain valve at the bottom of the tank. You can then run the other end to a floor drain or outside to safely empty the water.
Check the Drain Valve
The drain valve, located near the bottom of the tank, is a common culprit for leaks. This plastic or brass valve is used to drain the tank for maintenance, but its seals can wear out over time. It might also not be fully closed. To check it, press a dry paper towel against the valve and around its base. If the towel comes away wet, you’ve likely found your leak. Sometimes, you can stop a small drip by tightening the valve slightly with a wrench, but if the valve itself is cracked or faulty, it will need to be replaced.
Examine the T&P Valve
Every water heater has a temperature and pressure (T&P) relief valve. This important safety feature automatically opens to release pressure if the temperature or pressure inside the tank gets too high. It’s usually located on the top or side of the tank and has a discharge pipe that runs down the side. Check the end of this pipe for any signs of water. If it’s dripping, the T&P valve may be failing. While it’s designed to release water under pressure, a constantly dripping valve is a sign that it needs to be replaced by a professional.
Inspect the Heating Elements
On an electric water heater, there are typically two heating elements, each covered by an access panel on the side of the tank. Water can sometimes leak from the gaskets that seal these elements against the tank. Carefully check around the edges of these panels for any signs of dripping or corrosion. If you see water here, the gasket has likely failed. However, if you’ve checked all the fittings and valves and see water seeping directly from the bottom of the steel tank itself, it’s a sign of internal corrosion. Unfortunately, a corroded tank can’t be repaired and means it’s time for a full water heater replacement.
What to Do as Soon as You Spot a Leak
Discovering a puddle around your water heater can be alarming, but a calm and quick response can make all the difference. Acting fast not only prevents extensive water damage but also keeps your family safe from potential electrical hazards. Follow these steps immediately to get the situation under control before you even pick up the phone to call for help.
Your Emergency Shutdown Checklist
First things first: you need to stop the flow of water and electricity to prevent a small problem from becoming a big, expensive disaster.
- Cut the Power: Go to your home’s breaker box and switch off the circuit that powers your electric water heater. This is the most important step for preventing the risk of electric shock.
- Turn Off the Water Supply: Find the cold water inlet pipe on your water heater (it’s usually at the top). There should be a valve on this pipe—turn it clockwise until it stops. This will stop more water from entering the tank.
- Drain the Tank (If Necessary): If you’re dealing with a serious leak, draining the tank can prevent further flooding. Attach a garden hose to the drain valve near the bottom of the heater, run the other end to a floor drain or outside, and open the valve.
How to Minimize Water Damage
With the immediate dangers of electricity and flowing water handled, your next priority is damage control. The goal is to contain the water that has already escaped. Use old towels, buckets, or a wet/dry vacuum to soak up the standing water around the unit. If the leak is in a finished area, move any furniture, rugs, or valuables out of the way to protect them from damage. The faster you can dry the area, the lower your risk of mold growth and structural issues. If the mess feels overwhelming, remember that our team is ready to handle any residential plumbing emergency in Tucson, Sahuarita, and the surrounding communities.
DIY Fix vs. Calling a Professional
While it can be tempting to try a quick fix, a leaking water heater tank is not a DIY project. If you’ve traced the leak to a crack or corrosion on the tank itself, it’s a sign of internal failure. Unfortunately, this isn’t something that can be patched up; the entire unit needs to be replaced. Attempting a repair on your own can lead to improper installation, further leaks, or even void your warranty. The safest and most effective solution is to call a licensed plumber. We can accurately diagnose the problem and let you know if a simple part replacement or a full unit replacement is the right call. You can easily schedule an appointment online with our team.
Safety Around Electricity and Hot Water
It’s worth repeating: water and electricity are a dangerous combination. Never touch your electric water heater or stand in water around it until you are absolutely certain the power has been shut off at the breaker. If you decide to drain the tank, be extremely careful. The water inside can be scalding hot and cause serious burns. Wear protective gloves and make sure the drain hose is securely placed in a safe location before you open the valve. Your safety is the top priority, so if you feel unsure about any of these steps, it’s always best to wait for a professional to arrive.
Should You Repair or Replace Your Leaking Water Heater?
Finding a puddle under your water heater is stressful, and it immediately brings up a big question: is this a simple fix or do I need a whole new unit? The answer depends on a few key factors, including the heater’s age, the source of the leak, and the cost of the repair. Making the right call can save you money and prevent a much bigger headache down the road. Let’s walk through what you need to consider to make a confident decision.
Consider Your Heater’s Age and Condition
The first thing to check is your water heater’s age. Most traditional tank-style heaters have a lifespan of about 8 to 12 years. If your unit is approaching or has passed the decade mark, replacement is often the most practical choice. As a water heater ages, its internal components wear down. If you see water leaking from the bottom of the tank itself, it’s a strong sign that the inner tank has corroded and rusted through. Unfortunately, this kind of internal failure isn’t fixable. Pouring money into repairing an old, inefficient unit is usually just a temporary solution before another part fails.
Repairs That Are Worth the Investment
Not every leak spells doom for your water heater. If your unit is still relatively young and the leak is coming from a specific component, a repair is often a smart, cost-effective solution. For example, if the leak is dripping from the drain valve at the bottom, the valve might just be loose or its seal may have worn out. This is a straightforward fix that involves tightening or replacing the valve. Similarly, leaks from the temperature and pressure (T&P) relief valve or the heating element gaskets can typically be resolved by replacing the faulty part. If the tank itself is still in good shape, these targeted repairs can get your water heater running smoothly again.
Signs It’s Time for a Replacement
Sometimes, the signs are clear that your water heater’s time is up. The most definitive sign is water seeping from the seams or the bottom of the metal tank. As mentioned, this indicates internal corrosion, and the only solution is a full replacement. Other red flags include rusty or discolored hot water, which signals that the inside of your tank is rusting away. If you’re constantly needing repairs or if your heater struggles to produce enough hot water, it’s likely more economical in the long run to invest in a new unit. Continuing to patch up a failing system can lead to sudden, catastrophic failure and significant water damage.
Compare the Costs: Repair vs. Replacement
While a new water heater is a significant upfront expense, it can be the more financially sound choice over time. Newer models are far more energy-efficient, which can lead to noticeable savings on your monthly utility bills. Plus, a new unit comes with a warranty and the peace of mind that you won’t be facing another surprise leak anytime soon. When you’re weighing your options, consider the “50% rule”: if a repair costs more than half the price of a new unit, replacement is usually the better investment. The best way to get a clear picture is to have a professional take a look. Our team of expert plumbers can diagnose the problem and provide you with an honest assessment and transparent pricing for both repair and replacement.
How to Prevent Future Water Heater Leaks
Dealing with a leaking water heater is stressful enough without having to worry about it happening again. The good news is that a little proactive care can go a long way in extending the life of your unit and preventing future floods. By incorporating a few key tasks into your home maintenance routine, you can keep your water heater running smoothly and efficiently for years to come. Think of it as an investment in your home’s health and your own peace of mind.
Perform Regular Maintenance
Just like your car, your water heater needs regular check-ups to stay in top shape. Scheduling routine professional maintenance is the single best thing you can do to prevent leaks. During a service visit, a technician can spot and fix small issues before they become major disasters. They’ll check for corrosion, test safety valves, and ensure everything is working correctly. Signing up for a maintenance agreement can make this even easier, taking the guesswork out of scheduling and often providing savings on service calls. It’s a simple step that protects your home and ensures your safety.
Flush the Tank Annually to Remove Sediment
Over time, minerals like calcium and magnesium naturally present in Tucson’s water can settle at the bottom of your water heater tank, creating a layer of sediment. This buildup forces your heater to work harder to heat the water, reducing efficiency and causing the tank to overheat. Eventually, this can lead to corrosion, cracks, and leaks. Flushing the tank at least once a year removes this sediment, protecting the tank’s interior and keeping it running efficiently. While some homeowners tackle this themselves, having a professional handle it ensures the job is done thoroughly and safely as part of a comprehensive plumbing service.
Inspect and Replace the Anode Rod
Inside your water heater tank is a hidden hero called the anode rod. This metal rod is designed to corrode so that your tank doesn’t—it’s why it’s often called a “sacrificial” rod. It attracts corrosive elements in the water, essentially sacrificing itself to protect the steel tank lining. These rods typically last a few years, but once they’re depleted, your tank becomes vulnerable to rust and leaks. We recommend having the anode rod inspected every couple of years and replaced when it’s worn down. This simple replacement is far less expensive than replacing the entire water heater.
Set the Right Temperature to Reduce Stress
Setting your water heater’s thermostat too high not only wastes energy and poses a scalding risk, but it also puts unnecessary stress on the tank. High temperatures increase the pressure inside the unit, which can strain connections and even lead to a burst tank. For most households, a temperature setting of 120°F is perfectly adequate for all your hot water needs and is the recommended setting for safety and efficiency. If you’re unsure how to adjust it or want to verify the thermostat is accurate, a technician can check and calibrate it for you during a maintenance visit.
The Benefits of Professional Maintenance in Tucson
When it comes to your water heater, professional expertise provides invaluable peace of mind. A certified technician can safely perform all the tasks mentioned above—from flushing the tank to inspecting the anode rod and calibrating the temperature. More importantly, they have the trained eye to catch early warning signs of wear and tear that could lead to a leak down the road. For homeowners in Tucson, Oro Valley, Marana, and Sahuarita, having a trusted local expert ensures your system is safe and reliable. If you’re ready to get ahead of potential problems, you can schedule a maintenance visit with our team today.
Related Articles
- Water Heater Leaking? Your Step-by-Step Guide
- Leaking Water Heater? An Emergency Step-by-Step Guide
- Water Heater Leaking? Here’s What to Do Right Now
Frequently Asked Questions
I see a puddle under my water heater. What are the absolute first things I need to do? Before you do anything else, focus on safety. Go straight to your home’s circuit breaker panel and flip the breaker that controls the water heater to shut off the power. This is the most important step to prevent any electrical hazards. Once the power is off, find the cold water supply pipe leading into the tank and turn the shut-off valve clockwise to stop more water from flowing in.
Is a small, slow drip from the bottom of the tank really a big deal? Yes, you should always take any leak seriously. A small drip is a clear sign that something has failed, and it will not fix itself. That slow leak can worsen suddenly, leading to significant water damage, mold growth, and a much bigger mess. Think of it as an early warning sign that gives you a chance to address the problem before it becomes a full-blown emergency.
How can I tell if I need a simple repair or a whole new water heater? The answer usually comes down to the heater’s age and the source of the leak. If your unit is less than eight years old and the water is coming from a specific part like the drain valve or a heating element gasket, a repair is often a practical solution. However, if your water heater is over a decade old or if you see water weeping directly from the steel tank itself, it’s a sure sign of internal corrosion and the entire unit will need to be replaced.
Why can’t I just use a sealant to patch the leak on the tank? A leak coming from the tank itself is a symptom of a much larger problem: widespread internal rust and corrosion. A patch or sealant might hold for a short time, but it doesn’t fix the underlying issue that the tank’s structure is failing from the inside out. Attempting a patch is an unreliable and unsafe fix that puts your home at risk of a sudden and catastrophic flood when the tank finally gives way.
Once this is fixed, how often should my water heater be professionally checked? To prevent future surprises, it’s a great idea to have your water heater professionally inspected and maintained once a year. During a maintenance visit, a technician can flush out damaging sediment, check the health of the anode rod, and test the safety valves. This regular check-up not only helps prevent leaks but also keeps your unit running efficiently and extends its lifespan.


