
Is your morning shower a little too exciting? One minute it’s scalding hot, the next it’s disappointingly lukewarm. You shouldn’t have to guess what temperature the water will be. The good news is that you have more control than you think. That dial on your water heater isn’t just for show; it’s the key to consistent comfort, safety, and even lower energy bills. This guide is designed to walk you through a safe and simple Rheem electric water heater adjustment. We’ll cover everything from finding the recommended temperature setting to the step-by-step process, so you can get your water just right without any of the guesswork.
Key Takeaways
- Set your ideal temperature to 120°F: This setting is the sweet spot recommended by the Department of Energy. It delivers plenty of hot water for your daily needs while preventing scalding risks and reducing your energy consumption.
- Follow the correct adjustment process: Your safety comes first, so always shut off the power at the circuit breaker before you begin. For the water heater to work correctly, you must also set both the upper and lower thermostats to the exact same temperature.
- Recognize red flags that need a professional: If the water temperature doesn’t change after your adjustment, you see any signs of a leak, or the red reset button keeps tripping, it’s time to call for help. These issues point to a deeper problem that requires an expert diagnosis.
Get to Know Your Rheem’s Temperature Settings
Before you touch a single dial on your water heater, it’s helpful to understand what the ideal temperature is and why it matters so much. Finding that perfect setting isn’t just about getting a comfortably hot shower; it’s a balancing act between safety, energy efficiency, and even the health of your home’s plumbing system. Many water heaters are set to 140°F by default, but this is often hotter than most households need. A temperature that’s too high can pose a scalding risk and waste energy, while one that’s too low can create its own set of problems.
The goal is to find the sweet spot that keeps your family safe, your utility bills in check, and your water heater running smoothly for years to come. For most homes in Tucson, Oro Valley, and the surrounding areas, there’s a clear recommendation that hits all these marks. Understanding this baseline will give you the confidence to make the right adjustment for your household’s needs. Let’s walk through the specifics so you can feel good about the temperature you choose.
Why 120°F Is the Gold Standard
For tank-based water heaters, 120°F is the temperature recommended by the U.S. Department of Energy. Think of it as the perfect middle ground. Setting the temperature much higher creates a serious risk of scalding, especially for children or elderly family members. Water at 140°F can cause a third-degree burn in just a few seconds. On the other hand, dropping the temperature below 120°F can create a welcoming environment for harmful bacteria to grow inside your tank. This simple 120°F setting provides plenty of hot water for daily tasks while keeping your home and family safe.
The Benefits of the Right Temperature: Safety and Savings
Setting your water heater to 120°F does more than just prevent accidents. It’s also one of the easiest ways to save money on your energy bill. For every 10 degrees you lower the temperature, you can reduce your water heating costs by up to 5%. Plus, hotter water accelerates mineral buildup, also known as scaling, inside your water heater and pipes. This buildup reduces efficiency and can lead to clogs or damage over time. By keeping the temperature at a moderate level, you extend the life of your appliance and support the health of your entire residential plumbing system, preventing the need for premature repairs.
Gather Your Tools for the Job
Before you start adjusting your water heater, let’s make sure you have everything you need. A little preparation goes a long way in making this a smooth and safe process. The good news is you don’t need a professional-grade toolbox for this task. Just a couple of basic items and a strong focus on safety will get the job done right. Having your tools handy from the start means you can work efficiently without any interruptions.
Your Essential Equipment Checklist
To get to your water heater’s thermostats, you’ll need to open the access panels on the side of the unit. For this, a simple flathead screwdriver is usually all it takes. You will also need to locate your home’s circuit breaker box, as shutting off the power is a non-negotiable first step. While you’re at it, grab a flashlight or use your phone’s light, since the area around your water heater might be dimly lit. Having these few items ready will prevent you from having to stop midway through the process. It’s a simple task, but being prepared is key for any residential plumbing project.
Must-Have Safety Gear
When we talk about safety gear for this job, we’re mostly talking about knowledge and precautions. The single most important safety step is to turn off the electricity to your water heater at the circuit breaker. This prevents any risk of electric shock. While not required, wearing a pair of work gloves can protect your hands from any sharp metal edges on the access panels. Your most important safety tool, however, is setting the right temperature. The Department of Energy recommends a setting of 120°F to prevent scalding while still providing plenty of hot water and running efficiently. For ultimate peace of mind, consider a maintenance agreement to have a professional check your system annually.
How to Check Your Current Water Temperature
Before you start turning dials, you need a baseline. Finding out your water’s current temperature is the only way to know if an adjustment is truly necessary and, later, if your changes made a difference. This simple step removes the guesswork. You might even discover your water heater is set correctly, but another issue is causing temperature fluctuations. This quick check gives you the information you need to move forward confidently, ensuring you’re solving the right problem from the start.
Test the Water at Your Tap
Grab a meat or cooking thermometer for an accurate reading. To get the best measurement, head to the faucet closest to your water heater, which is often in the kitchen. Turn on the hot water and let it run for a minute until it feels consistently hot. Next, fill a glass with the water and place your thermometer inside. Let the reading stabilize for about a minute to see your current water temperature. If you want to be extra sure your thermometer is accurate, you can test it in a glass of ice water first; it should read 32°F.
Why Temperatures Can Vary Throughout Your Home
Don’t be surprised if the temperature in your upstairs shower is a few degrees cooler than what you measured at the kitchen sink. Water naturally loses some heat as it travels through the pipes in your home. The farther the water has to go from the heater, the more heat it can lose along the way. This is completely normal. That’s why it’s best to test the water at a faucet close to the unit. It gives you a more accurate idea of what your water heater is producing before heat loss becomes a factor in your home’s residential plumbing system.
Prioritize Safety Before You Start
Before you even think about grabbing a screwdriver, let’s talk about safety. Adjusting your water heater is a straightforward job, but since you’re working with both electricity and hot water, taking a few precautions is essential. A little prep work goes a long way in making sure the process is smooth and, most importantly, safe. Think of these steps as your pre-flight check; they ensure everything is in order before you get started. Rushing this part can lead to bigger problems, so take your time and do it right.
Essential Electrical Safety Rules
First things first: turn off the power to your water heater. This is the most critical step, and it’s not optional. Head to your home’s circuit breaker box and find the breaker labeled for your water heater. It might be a double-pole breaker, which is wider than the others. Flip it to the “Off” position. This action cuts off the electricity to the unit, preventing any risk of electric shock while you work. If you’re not sure which breaker it is, you can turn off the main breaker to be absolutely certain the power is disconnected.
Prepare Your Water Heater for Safe Access
Your Rheem water heater’s thermostats are protected behind small metal covers called access panels. You’ll typically find one near the top of the tank and another near the bottom. Using a flathead or Phillips head screwdriver, carefully unscrew and remove both of these panels. Behind them, you’ll likely see some insulation, which you can gently pull back or remove to expose the thermostat dials. Setting the panels and their screws aside in a safe place will make reassembly much easier when you’re finished with the adjustment.
Check for Leaks and Damage
While you’re at the unit, take a moment to give it a quick visual inspection. Look for any signs of water, rust, or corrosion on the tank and the floor around it. Pay close attention to the temperature and pressure relief valve (T&P valve), which is a crucial safety device. If you notice water dripping from this valve or see any other signs of a leak, stop what you’re doing. A leak can indicate a serious issue that requires professional attention. It’s always better to be safe and call for expert residential plumbing services if you suspect a problem.
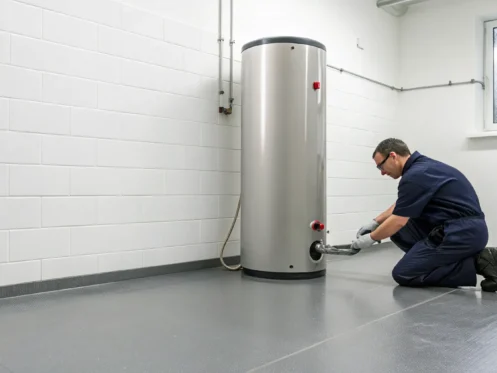
Adjust Your Rheem Electric Water Heater: A Step-by-Step Guide
Adjusting the temperature on your Rheem electric water heater is a totally manageable weekend project that can make your home safer and more energy-efficient. With a few basic tools and a little bit of care, you can get the job done in under an hour. This guide will walk you through each step, from shutting off the power to turning it back on. Remember, safety is the top priority here. If you follow these instructions and still feel unsure about any part of the process, don’t hesitate to schedule an appointment with a professional. We’re always here to help homeowners in Tucson, Marana, and Sahuarita get their home systems running perfectly. Taking control of your water heater’s temperature not only prevents accidental scalds but can also lower your monthly energy bills. It’s a simple change with a big impact.
Turn Off Power at the Circuit Breaker
Before you even think about touching your water heater, you absolutely must turn off the electricity. This is the most critical step for your safety. Head to your home’s main electrical panel or circuit breaker box. Find the breaker that controls your water heater; it should be clearly labeled. Flip the switch to the “OFF” position. To be extra certain the power is disconnected, you can use a non-contact voltage tester near the water heater’s wiring. This quick double-check confirms there is no live current, protecting you from the risk of electric shock while you work on the unit. Never skip this step.
Remove Access Panels and Insulation
With the power safely off, you can now get to the thermostats. On the side of your Rheem water heater, you’ll find two small metal plates, one near the top and one near the bottom. These are the access panels. Using a Phillips or flathead screwdriver, remove the screws holding each panel in place and set them aside somewhere you won’t lose them. Behind each panel, you’ll see a piece of fiberglass or foam insulation. Gently pull the insulation out to reveal the thermostat and heating element wiring. Don’t discard the insulation; you’ll need to put it right back where you found it when you’re finished.
Locate the Upper and Lower Thermostats
Behind the insulation, you will find the upper and lower thermostats. Most electric water heaters use two separate thermostats to ensure the water is heated evenly throughout the tank. They look like small plastic or metal components with a dial or screw in the center that indicates the temperature setting. Each thermostat is connected to a heating element. It’s essential to adjust both thermostats to the same temperature. Setting them differently can cause one element to overwork, leading to inefficient heating and potential damage to your residential plumbing system over time.
Make Your Temperature Adjustments
Now it’s time to set your desired temperature. Using a flathead screwdriver, gently turn the dial on the upper thermostat to your chosen setting. The Department of Energy recommends 120°F for a good balance of safety and efficiency. Turning the dial clockwise usually increases the heat, while turning it counter-clockwise decreases it. Once you’ve set the upper thermostat, repeat the exact same adjustment on the lower one. Making sure both are set to the identical temperature is key for balanced performance. Avoid making drastic changes; a small, careful adjustment is all you need.
Reassemble and Restore Power
Once you’ve adjusted both thermostats, you can put everything back together. Start by placing the insulation back over the thermostats, ensuring it fits snugly. Next, reattach the metal access panels using the screws you set aside earlier and make sure they are secure. With the water heater fully reassembled, you can go back to your circuit breaker box and flip the switch back to the “ON” position. It will take an hour or two for the water in the tank to reach its new temperature, so be patient before testing it at the tap.
What to Do If the Water Still Isn’t Right
You’ve followed the steps, but your water temperature is still not where you want it to be. Don’t worry, this can happen. Before you call for backup, there are a few more troubleshooting steps you can take to pinpoint the problem. It could be something as simple as an inaccurate thermometer or a tripped safety switch.
We’ll walk through how to double-check your temperature reading, reset the high-limit switch, and identify other common issues that might be affecting your water heater. These final checks can often solve the problem. If they don’t, you’ll have a much better idea of what’s going on when you do decide to call in a professional. Let’s figure out what’s happening with your water heater.
Test the Water Temperature Again
First things first, let’s make sure your thermometer is giving you an accurate reading. To check its calibration, fill a glass with ice and water and let it sit for a minute. Place your thermometer in the glass; it should read 32°F. Next, run the hot water at the tap closest to the water heater until it’s fully hot, then fill a cup and test it. If your thermometer was off, you might just need to make another small adjustment. If the thermometer is accurate and the water temperature is still wrong, it’s time to move on to the next step.
Reset the High-Limit Switch
Your Rheem water heater has a safety feature called a high-limit switch, which automatically shuts off the power if the water gets dangerously hot. Sometimes, this switch can trip and may need to be reset. You’ll find a red button located near the upper thermostat, usually labeled “Reset.” With the power still off, firmly press this button. If it clicks, it was tripped. This might solve your problem, especially if you had no hot water at all. If the switch won’t reset or trips again after you restore power, there’s an underlying issue that needs a professional’s attention.
Troubleshoot Common Temperature Problems
If you’ve re-tested the temperature and reset the high-limit switch with no luck, the problem likely lies with a component inside the water heater. The issue could be a faulty thermostat, a failing heating element, or significant sediment buildup insulating the element from the water. While your owner’s manual might offer some additional troubleshooting tips, these problems typically require professional tools and expertise to diagnose and fix safely. Trying to replace these parts yourself can be risky. When you’ve exhausted the DIY options, it’s best to let an experienced plumbing technician take it from here.
Common Mistakes That Can Harm Your Water Heater
Adjusting your water heater’s temperature seems straightforward, but a few common missteps can lead to inefficient performance, higher energy bills, or even damage to the unit. It’s easy to think a quick turn of the dial is all it takes, but taking a moment to avoid these errors will protect your water heater and keep it running smoothly for years. By understanding what not to do, you can ensure your adjustments are both safe and effective, saving you the headache of a cold shower or an expensive repair call.
Setting Different Temperatures on Each Thermostat
One of the most frequent mistakes is setting the upper and lower thermostats to different temperatures. Your Rheem electric water heater works as a team, with two separate heating elements and thermostats that need to be in sync. When they’re set differently, one element is forced to work much harder than the other to heat the water, creating an imbalance. This not only wastes energy but also puts unnecessary strain on the components, which can lead to premature failure. For the best efficiency and lifespan, always ensure both thermostats are set to the same temperature. This simple step is crucial for maintaining your home’s entire residential plumbing system.
Adjusting the Temperature Too Drastically
It can be tempting to crank the thermostat way up if your water feels too cool, but making drastic temperature changes is tough on your water heater. Sudden, large adjustments can shock the heating elements and thermostats, potentially shortening their lifespan. Instead, make small, incremental changes of just a few degrees at a time. Wait several hours after each adjustment to test the water at the tap before deciding if another change is needed. This patient approach is gentler on the system and helps prevent issues like accelerated sediment buildup, which is a common concern in Tucson. Regular check-ups under a maintenance agreement can help keep your unit in top shape.
Forgetting to Read the Manufacturer’s Guide
Your water heater’s manual is your most valuable tool. Every Rheem model is slightly different, and the manufacturer’s guide contains specific instructions, diagrams, and safety warnings tailored to your exact unit. It will tell you precisely where the thermostats are and how to access them safely. Skipping this step is a gamble that can lead to improper adjustments, damaged components, or even personal injury if you forget a critical safety measure like turning off the power. If you’ve misplaced your physical copy, you can usually find a digital version on the manufacturer’s website. If you read the guide and still feel unsure, it’s always best to schedule an appointment with a professional.
Maintain Your Water Heater After the Adjustment
Great job on adjusting your water heater’s temperature! But don’t stop there. Just like any other major appliance in your home, your water heater needs a little TLC to keep it running efficiently and safely for years to come. Think of it as a partnership. You’ve done your part, and now it’s about keeping up the good work with a simple maintenance routine. These next few steps will help you protect your investment, prevent surprise breakdowns, and ensure you always have hot water when you need it.
Create a Regular Temperature-Check Routine
Now that you’ve set the perfect temperature, make it a habit to check it every few months. This ensures it stays right where you want it, preventing accidental scalding and keeping your energy bills in check. The easiest way to do this is with a cooking thermometer. Just run the hot water at the faucet closest to your water heater and test the temperature. It’s a quick, two-minute task that gives you peace of mind. If you notice the temperature has drifted, you’ll know it’s time to take a closer look or give a professional a call.
Prevent Sediment Buildup
Over time, minerals like calcium and magnesium can settle at the bottom of your water heater tank, creating a layer of sediment. This buildup forces your heater to work harder to warm the water, which reduces its efficiency and can shorten its lifespan. To keep things running smoothly, your water heater needs to be flushed periodically. This involves draining the tank to clear out the sediment and refilling it with fresh water. This simple maintenance is a core part of our residential plumbing services and can make a huge difference in your heater’s performance and longevity.
Schedule Annual Professional Inspections
Your water heater needs routine maintenance, just like your car needs an oil change. An annual professional inspection is the best way to catch small issues before they become big, expensive problems. During a check-up, a certified technician can spot signs of corrosion, test the pressure relief valve, and make sure all the electrical components are working safely. This is especially important for homeowners in Tucson, Oro Valley, and Sahuarita, where hard water can accelerate wear and tear. Signing up for a maintenance agreement is an easy way to stay on top of this and ensure your system is always in expert hands.
Know When to Call a Professional
While it’s empowering to handle home maintenance yourself, it’s just as important to know when a project is beyond your scope. Adjusting your water heater’s temperature is one thing, but diagnosing and fixing underlying problems is another. When it comes to the combination of water, electricity, and pressure, safety should always be your top priority. Pushing your DIY limits can lead to bigger, more expensive problems or, worse, create a dangerous situation for your household.
Think of it this way: a professional technician has the training, specialized tools, and experience to solve the problem quickly and correctly. They can spot issues you might miss and ensure the repair is done right the first time. If you find yourself feeling uncertain or if the problem seems more complicated than a simple adjustment, it’s always the smarter choice to call for help. Here are a few clear signs that it’s time to put down the tools and schedule an appointment with a pro.
You Suspect an Electrical Problem
Working with your water heater’s electrical components is not the time for guesswork. If you suspect an electrical issue, it’s crucial to step back. Signs like a high-limit switch that keeps tripping can indicate a serious overheating problem, which is a major safety risk. While the issue could be as simple as a faulty fuse, it could also point to more complex wiring problems. Instead of taking a chance, it’s best to have a licensed technician safely diagnose and handle any residential plumbing and electrical repairs.
The Temperature Won’t Cooperate
You’ve followed all the steps, but your water is still lukewarm or scalding hot. If adjusting the thermostats doesn’t change the water temperature, it’s a clear sign of a deeper issue. The problem could be a faulty thermostat, a broken heating element, or another internal component that needs a professional diagnosis. Continuing to tinker with it won’t solve the root cause. A professional can quickly identify what’s wrong and get your hot water back to the perfect temperature without any more frustration on your part.
You See Signs of Damage or Leaks
Water pooling around the base of your water heater is a major red flag that requires immediate attention. Even a small drip can signal a serious problem, such as a corroded tank or a broken pressure relief valve. These issues can lead to significant water damage in your home and compromise the safety of the unit. Don’t wait for a small leak to become a big flood. If you see any signs of leaking or visible damage to the tank or connections, call a professional plumber right away to assess the situation and prevent further damage.
Related Articles
- 4 Signs Your GSW Water Heater Thermostat is Bad
- 6 Reasons Your Gas Water Heater Shuts Off By Itself
- Hot Water Heater Leaking From Overflow Pipe? 5 Fixes
Frequently Asked Questions
Why is 140°F a bad idea if that’s how my water heater came from the factory? Many manufacturers ship water heaters at a higher setting, but 140°F poses a serious scalding risk, especially for children and elderly family members. A severe burn can happen in just a few seconds at that temperature. The recommended 120°F provides perfectly hot water for showers, dishes, and laundry while being much safer for your family and more energy-efficient for your wallet.
How long will it take for the water to reach the new temperature after I make an adjustment? After you’ve adjusted the thermostats and restored power, you’ll need to be a little patient. It typically takes a couple of hours for the entire tank of water to heat up or cool down to the new temperature. It’s best to wait at least two to three hours before testing the water at your tap to get an accurate reading of the change.
I have no hot water at all. Should I still try adjusting the temperature dials? If you suddenly have no hot water, the first thing to check is the high-limit reset switch. This safety feature, usually a red button near the upper thermostat, can trip and cut power to the heating elements. After turning off the power at the breaker, try pressing this button firmly. If it clicks, you may have solved the problem. If that doesn’t work or the switch keeps tripping, it’s a sign of a deeper issue that needs a professional.
Does this guide work for a gas water heater, too? No, this guide is specifically for electric water heaters. Gas models have a completely different system for temperature control, which usually involves a single dial on the gas control valve near the bottom of the tank. Adjusting a gas water heater involves different steps and safety precautions, so you should always consult your owner’s manual for the correct procedure.
Is flushing the sediment out of my water heater something I can do myself? Flushing your water heater is a key maintenance task that can significantly extend its life, especially with the hard water we have in the Tucson area. While it is a manageable DIY job for some, it does involve connecting a hose and carefully handling very hot water. If you’re not completely comfortable with the process, our technicians can handle it for you during a routine maintenance visit to ensure it’s done safely and thoroughly.


